Remove Stray Line From an Unknown Layer
I’m getting better, but I have to admit that I often forget to pay attention to which layer I’m working on.
Inevitably, when I draw something on the wrong layer, it’s the one thing I want to erase later, when I have a dozen layers and can’t figure out which one it was on.
There are two quick fixes for this.
Erase It. ALL of It
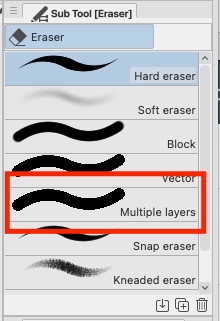
First, if it’s just a stray mark you want to remove and it isn’t interfering with any of the rest of the art, use the Erase Multiple Layers tool. Delete the stray mark, then go back through the other layers and replace anything that got deleted along the way.
This will work, but it’s very destructive, so be careful. It works best only in isolated places that can be easily reconstructed, like where you only need to color back in the color of the background to fix the newly erased portion.
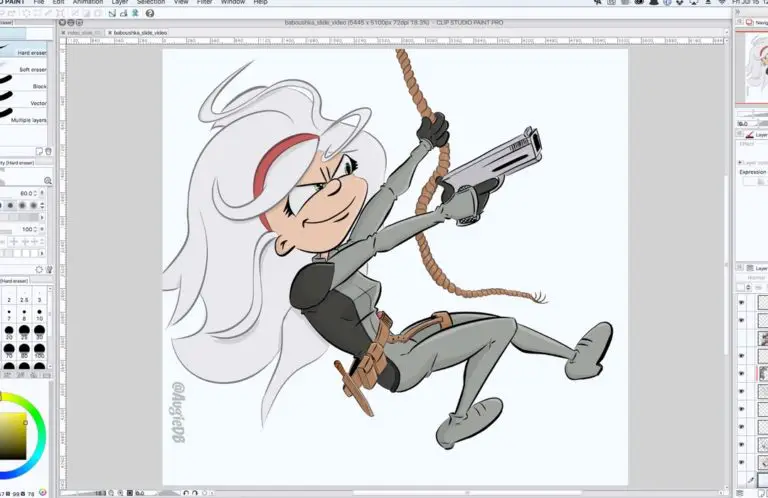
The Object Tool
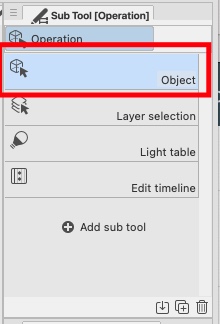
If you need to be more accurate, though, the Object tool will direct you to the right layer. Use the “O” keyboard shortcut to select an object, then click on the stray line. CSP will move you to the layer that mark is on. Then, you can erase as you normally would (use the Hard Eraser) , or do whatever other correction you might need.
This is the preferred method as it’s the most precise and does the least damage to everything surrounding the stray mark. You still need to be careful, but it eliminates many issues that erasing from all layers causes.
You may even want to hide all the other layers while you fix the error on this one. That way, you won’t be surprised when you erase something you didn’t realize was on the same layer.
Credit: Header Image by Evan-Amos (Own work) [Public domain], via Wikimedia Common


This was a very valuable tip, thanks.
Selecting the layer under your mouse can also be done with ctrl+shift+mouse1 (Windows shortcut).