
How Do I Pick the Right Skin Tone?
Skin colors are tough and there are all sorts of theories behind creating and using them.
The easiest thing to do, of course, is to bathe every scene in a strong red light and color everyone’s skin red.
That’s my useless #ProTip for the day.
Here’s a much more useful one:
The Skin Tone Color Palette
The folks behind Clip Studio Paint recently uploaded a color palette for free that’s an incredible help. The page is in Japanese, however, so you’ll be doing some guessing to get it.
Let me help:
On the native ClipStudio.net website, there’s a materials page that gives you all sorts of brushes and palettes to download for free. In the top couple of rows, you’ll see this sequence of palettes:
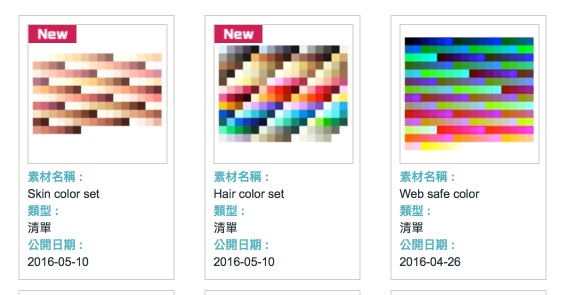
- Skin Color Set
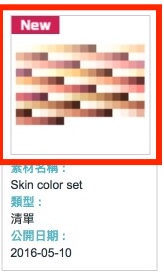
- Hair Color Set
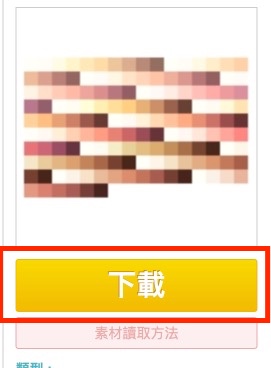
- Web Safe Colors
That last one is most useful if you’re designing a web page in CSP or drawing a webcomic for computer screens only.
The hair colors palette’s usefulness is somewhat questionable. It’s a handy set of suggestions, but it’s far easier to fake a hair color than a skin color. The wrong shade of brown won’t look wrong in the hair, but will utterly destroy a drawing if it’s the wrong skin tone. Also, the colors are a bit crazy, including lots of blues and greens. Odds are good you won’t ever need more than 20% of those colors.
The Skin Tones Set, though, is pure gold. It has a series of gradients of colors from the purest white to the darkest blacks, with lots of reds and browns in between. It has you covered. But how do you install it? Which links do you click? What does it do?
How to Download It
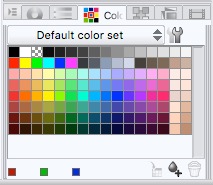
Here’s the trick. That blue writing on the page? They’re not links. They’re just text written in a blue font. You want to click the color set they’re showing on the page. It’s the part circled in red:
That’ll bring you to another indecipherable page. To download this color set, click this link that I’ve again circled (er, rectangled?) in an unimaginative red color:
That will kick the download process off, where the file will likely save in your Downloads directory, or wherever you’ve set up your default downloads directory to be in your web browser of choice.
Install the Palette
Go to the Color Palette window with all the different color options. Click the Color Set tab. That’s this one:
You can also get there from the menus with Window –> Color Set.
Now, the key to this whole process is the little hamburger-like icon in the upper left corner of the window that looks like it’s grayed out. Don’t click the wrenches, which is what you might have gone to first. No, go to this options choice:
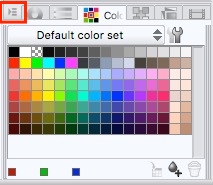
Choose “Import Color Set” and insert the file you just downloaded. This adds a new option in the dropdown menu called “Skin color set.” You’ll see it at the bottom of the list.
Instantly, you can narrow down your choices in skin tones to far fewer options than you had when you were fiddling with sliders to get the right orange or brown shade.
Additional Resources
I had a full bullet point list to share here, but all you really need is this Pinterest page. It has dozens of useful tutorials and examples of artwork that deals with picking skin tones. It’s all you need.
If I had to narrow it down to just one, though, I like how this tutorial describes undertones and environmental light, then uses them in a digital Photoshop painting.
With a topic like this, it’s important to realize you don’t need to just look at CSP tutorials for answers. There’s a lot of information on skin textures and tones out there. Some of it is written for Photoshop, and some of it covers oil or acrylic paints. You can easily translate those steps to Clip Studio Paint. A lot of the tools and settings look alike.


You can download English versions of the materials here:
http://www.clipstudio.net/en/dl/materials/
Firstly, just noting that there’s actually an English page for this now 🙂
http://www.clipstudio.net/en/dl/materials/detail/418/
Secondly, I was wondering, I have a Mac (no idea if this is why this won’t work, I don’t think so, just adding that bit of info). Whenever I download the set, it’s saved in my downloads as a .cls and I can zip it, and unzip it again, but it remains this useless file that I don’t know what to do with. Please help me!
Sam — Have you tried to IMPORT the cls file into your color sets? All the tutorials on this site are done on a Mac, so we’re on the same boat. But until you install the CLS file, it is going to be fairly useless.