
Drawing Word Balloons from the Center
First and foremost: Always do the text first. Then draw the word balloon around it.
The trick to this is learning how to size and place that balloon. The default in CSP is to drag a line from what is essentially one corner of the balloon to the far corner. Then you can move it around and shrink it to properly fit around the lettering.
There’s another way to do it, and it’s the way I prefer. Let me show you how.
How to Draw a Word Balloon from the Center
Go to the word balloon tool. Being a keyboard shortcut kind of guy, I like to type “T” to get to the Text Tool options, and then click on the “Ellipse Balloon” tool from there.
With the word balloon tool open, click on the wrenches at the bottom corner of the pane. That will bring up the settings:
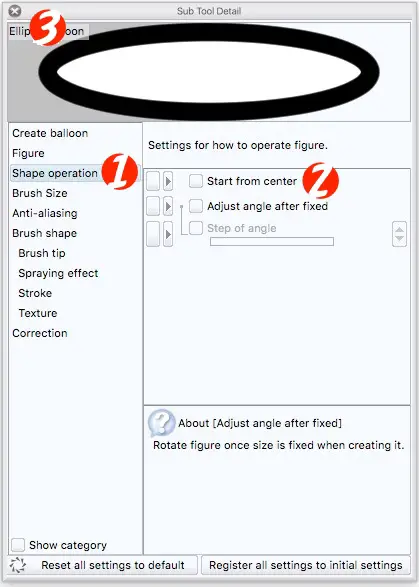
- Choose “Shape Operation”.
- Check the box for “Start from center.”
- Click the “X” in the upper left corner to close the window, and your new setting will be ready to go.
Now you can draw a word balloon by pulling out from the center of the text to surround it.
See the Difference
Here are the two ways:
If it’s not perfect, you’ll have to move the text around to fit in the balloon. If you try to move the balloon, it’ll take the text with it. Center the text inside the balloon first, then move the balloon into the final position you want it on the page.
Now you have a choice between two ways of drawing round word balloons. Since the lettering in word balloons generally belongs in the middle, it makes more sense to me to pull the balloon out from the center of the text than to try to judge a box around it. Your mileage may vary.


Nice thanks